The Brettanomyces Invasion... oh my

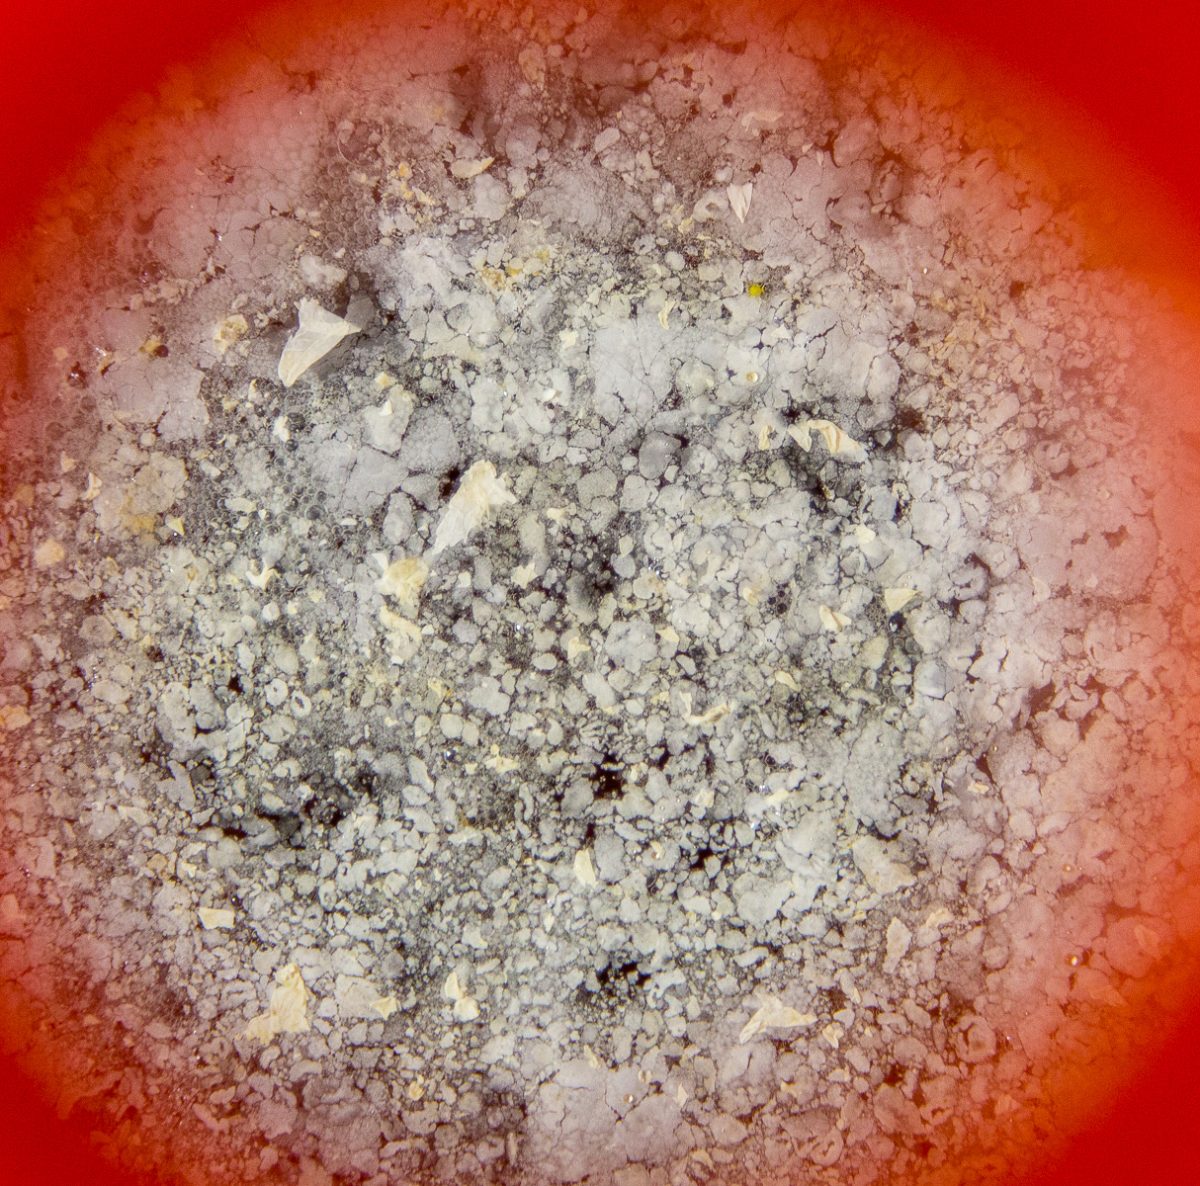
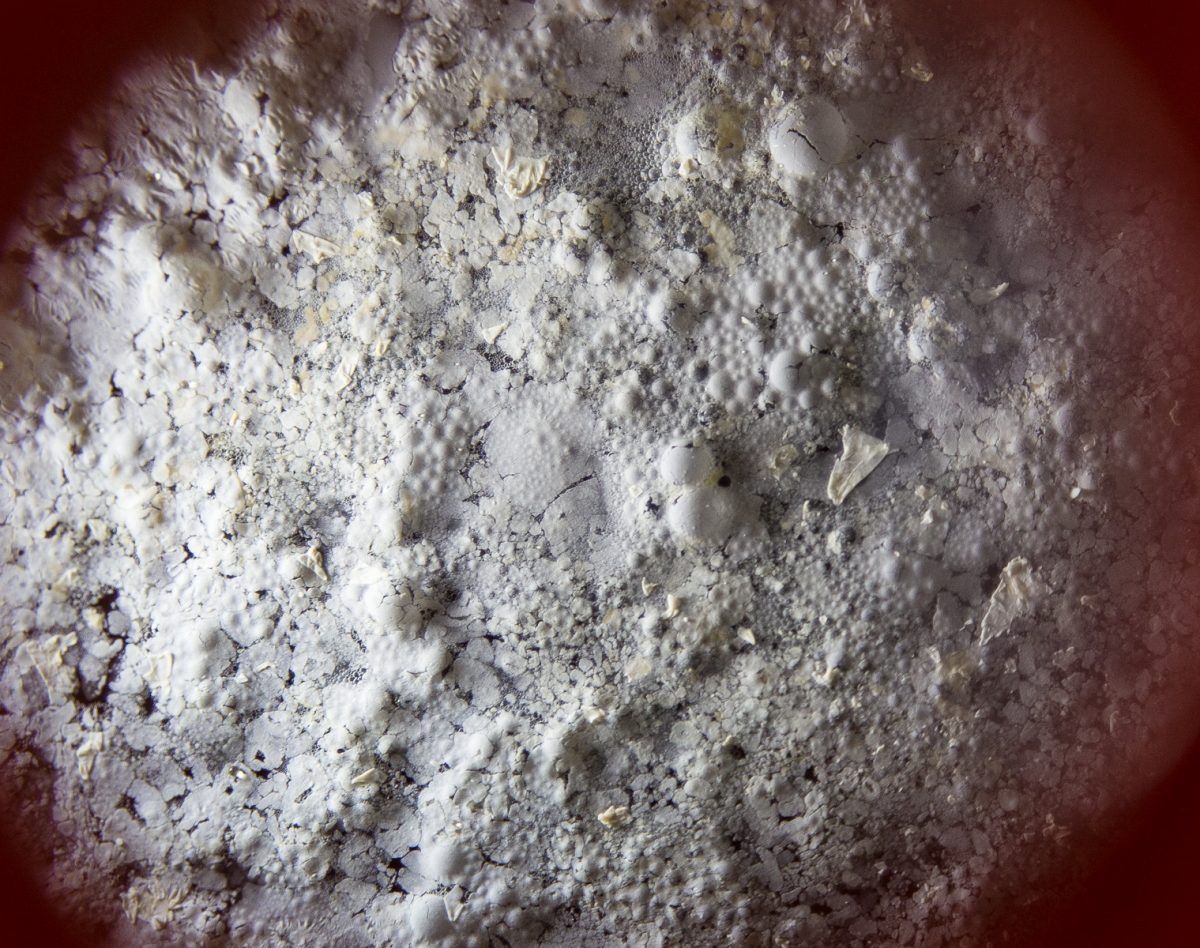
What an ugly surprise. Yesterday, I was adding some sugar into my split batch saison, and saw this. Unintentionally I managed to contaminate the batch with Brettanomyces. I have played with Brett quite a bit in the brewery, but how it managed to sneak into this batch remains a mystery. Well sort of...
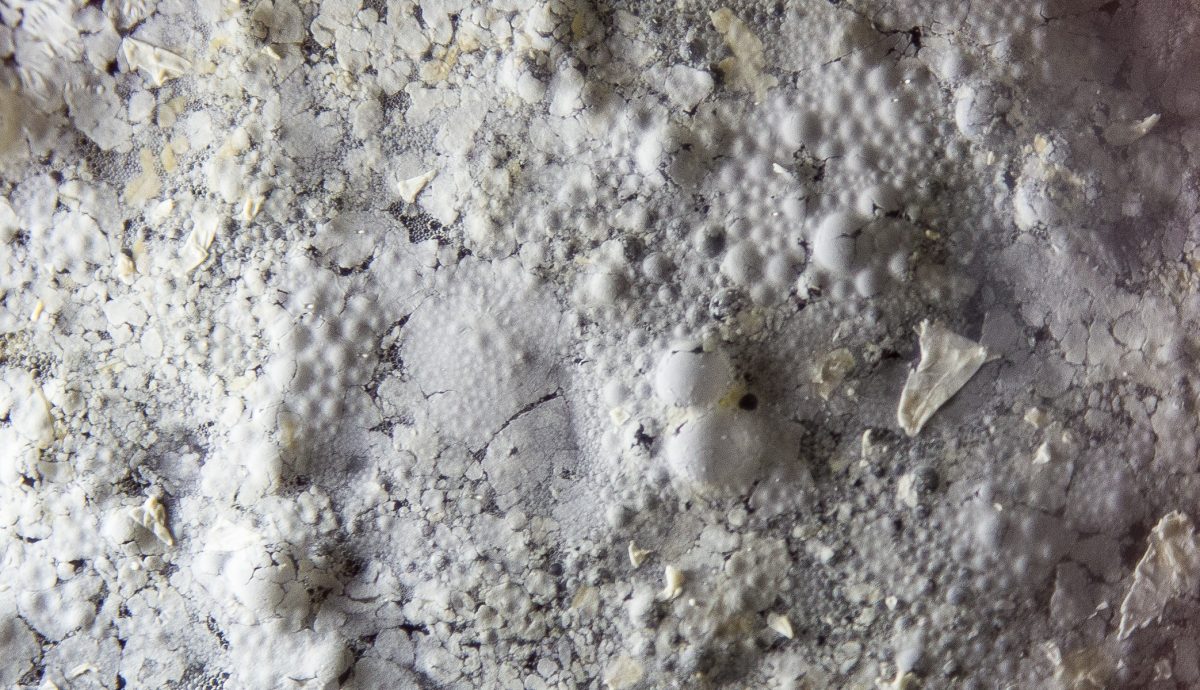
Yesterday evening, I opened my conical fermenter, which just had a nice dankish IPA in it - to find... a huge pelicle there as well. The stainless got a solid scrub, and all of the parts and pieces went into the dishwasher with PBW, a hot rinse and a steam sanitary cycle. As well as all of the hoses and fittings post boil kettle in the brewery. This still doesn't mean I have solved everything.
Recently, Chris Colby, viking and master of brewing, posted to Beer and Wine Journal an article titled "When is Sanitation Most Important?" and it seems timely as with the above issue. So I thought it necessary to walk through the process of elimination, and possibly trace the route and source of contamination.
1. The Brewery: Everything post the boil kettle should always be cleaned and stored in sanitary conditions. Notice I said "CLEANED" - meaning the removal of debris, dirt and any organic matter. This means washing it, but not with detergents. I like PBW and occasionally Oxyclean. Oxy is a bit more gentle and can be used in cooler water, where PBW is more aggressive and really likes hot water (135-150F). As a matter of cleaning up the MLT and BK, I will typically run hot PBW cycles, followed with a cold water rinse. The hot PBW is then pumped through the plate chiller, followed by the cold water rinse. Where I have gotten lazy - picking up and putting away the hoses. I have been leaving them connected and on the floor. BAD BREWERY PRACTICE. So, those hoses have gone through a thorough cleaning and hot steaming and are now dripping dry. Make sure to clean carefully around the connectors, whether Tri-Clamps or MPT/NPT, as well as the gaskets.
2. The Lab: Small confession. My lab is a bathroom. It is the worst possible place to have a lab, but convenient with a sink and the bathtub where things can be hidden away. It is also a moist environment, and if a used bathroom, capable of spraying bacterium into the air to settle on surfaces. I have two layers of shower curtain protecting fermentation in the tub, as well as airlocks. No unintentional inoculations have occurred yet from that scenario. However, I also have been experimenting with dregs that I grew from bottles of Russian River Damnation and some Roselaire. I fermented some ciders and a mead, as well as have been planning the occasional all-Brett fermentation for more authentic farmhouse ales.
Yeast Starters: I generally make yeast starters with liquid yeasts and DME. This is done in the "Lab" on a stir plate with fairly rigorous sanitation. The bad corners that I cut: are usually related to flaming the lips of vessels when transferring and relying too heavily on Star San alone. I am going through my lab this week and steam sanitizing everything possible, as well as giving the working surfaces a good scrub and sanitation.
Yeast Washing: Ok, I really dropped the ball here. I have gotten fairly lazy by just scooping yeast and trub from a fermentation, or collecting yeast from the conical with a site glass. Here is where I think things went south - I have been a bit sloppy about using my mason jars. While I regularly use Star San, these jars need a much better cleaning and sanitation routine. I SUSPECT, but cannot confirm, that I may have used mason jars that previously hosted my Brett dregs, and did not clean and sanitize adequately. The same is true of the lids and screw rings. Shame on me. The contaminated saison was a third generation re-pitch, and I didn't fully wash the yeast.
Yeast Rehydration: Same as above, I use the mason jars to rehydrate dry yeast. I use dry yeast extensively, as I feel I have a more consistent process with it (see the lazy comment above). I also always rehydrate with warm water and a little yeast nutrient. The IPA was a rehydrated pitch of US-05.
The Fridge: unfortunately, I share my yeast storage (under vacuum pressure in mason jars) with the daily refrigerator. This is less than ideal, but my kegerator cycles so at least this is more stable in terms of temperature. I need to figure out a better mechanism for this. Seriously - you should culture your fridge sometime - it is scary!
3. The bits and baubles: I have a lot of various bits and lengths of tubes and connectors used here and there. These MUST all go through an appropriate sanitation cycle or be discarded. Plastic is cheap (most of the time) and easy to replace.
The Upside:
Brett in the Saison is a happy happy accident. I prefer to ferment on Brett in stainless as the ability to clean and sanitize. This time it is in a brand new 15 gallon Speidel Fermenter. It sits far away from the lab and the brewery, next to a piano, so no proximal cross contamination. I seriously suspect the yeast pitch. The happy part is that brett is entirely appropriate in a farmhouse styled ale - such as a saison. This is the batch that I mentioned in an earlier post - where the barrel it went into stripped all of the phenolics. Brett here is adding a new layer of esters and phenols that are complimenting the basic beer. Where the saison was just a little tart - it is tightening up and producing a bit more acidic profile. It is quite refreshing, and I am looking forward to bottling and aging this batch. It will go for at least another month or two however.
When I am finished, two things will happen. Despite the general perspective that plastic cannot be completely cleaned and should be dedicated to "sour" beers, I will give this fermenter a very deep clean, chemically. Per the advice of a friend, I am NOT going to use bleach or an acidified bleach solution. Active chemicals such as chlorine will affect the plastic. So first thing is a very strong spray out, followed with a full soak in warm PBW to the top. This will require me to heat water in the BK - and transfer over. All parts, air locks, valves, etc. will be disassembled and dropped in for the soak. After that, I will spray out aggressively again - and fill with chlorinated water, drain, dry and finally spray down with very foamy Star San - and store it with some Star San inside, until next use. This process has worked for me in the past with very good results.
So forgive the confessional. Perhaps my own public shaming will drive me to be far more organized and focused on sanitary practices.