
Low oxygen brewing has been largely dismissed as a quality issue for home brewing. The term “Hot Side Aeration” or HSA was once considered a serious home brewing problem when George Fix described beer stability issues in Principles of Brewing Science: A Study of Serious Brewing Issues. Since, a number of magazine articles, blogs, and presentations, seem to have minimized HSA as not relevant at home brewing scales. Controversy. The question remains, can low oxygen brewing improve my beers? To what extent?
Introduction:
My palate has dramatically shifted from hoppy to malty, particularly toward delicate but flavorful lagers. If you recall from my Tale of Two Lagers post, I also believe brewing lagers to reveal weak spots in my skills and techniques. My beers were satisfactory, but I was finding mild but annoying astringency that I mused to be low oxidation of the beer on the cold side, but not in the classic Hot Side Aeration sense, which seems linked to cardboard off-flavors. I rebuilt my chilling rig. I read a lot (Kunze, Noonan, Fix, etc.). I revised my recipe approach and focused on mashing technique. I became tedious about pitching temperatures, pitching rates, and cold side handling. My beer improved; by inches, not by miles. I even bought an oxygen meter to measure dissolved oxygen (DO) saturation on the cold side through to packaging. Inches, not even feet.
I had already decided to do a complete reset with my brewing and use all of my tools to measure process through the entire system, hot and cold, and isolate the weak spots, documenting everything, and use a post on Reddit /r/lagerbrewing to keep me on track. Since I already had the meter, it made sense to deploy it. A couple of German Brewery Forum (GBF) members reached out to me and I was open about where I was in this process.
Kismet. The following Monday, GBF released their paper titled, “On Brewing Bavarian Helles: Adapting to Low Oxygen Brewing”. My initial reaction was skeptical, as no backup data or proof is provided in the paper. The tone is very authoritative, but the references classically point to Kunze, Narziss, and other professional brewing texts, some of which I had access. While the claims are bold, they polarized some of the home brewing community. However, the paper provides a complex brewing and fermentation procedure that is testable. Since I was revisiting my whole process, I decided to give it a try. The forum was unlocked and the tone and context flipped from “top-secret” to “open-source”.
GBF has been highly criticized for the lack of data in the paper, and I sort-of-get it from both sides. The personal and mocking nature of online criticism meant that data would be dismissed out of hand or picked apart, and the overall low oxygen discussion would dismissed without careful consideration. The confidence of the claims could also be interpreted as hubris. Context, as it often does, fails to convey intent on internet forums and communities. Even with my healthy dose of skepticism, given the amount of research, work, and direct brewing that led to this hypothesis, I couldn’t just ignore the hypothesis in this era of sloppy citizen science of home brewing. I have found the brewers at GBF to be open, encouraging, and far more open minded in the face of a fairly strong initial backlash. They remain confident in their findings and helpful if you are willing to give LODO a try.
Breaking down the Low Oxygen Brewing paper:
The key assertion in the paper is that OXYGEN is the enemy of fresh malt flavors from milling to grain-in to fermentation and packaging. While taking on the controversy of Hot Side Aeration (HSA) straight on, there is little debate in the paper. Rather a declaration that Hot Side Oxidation (HSO) exists and has a dramatic impact on brewing processes, professional and at home. This is, perhaps, the most polarizing and binary component. There is also an implied division of skill in that the techniques are only in the reach of the more advanced home brewing systems and skilled brewers. This low oxygen brewing technique has been named LODO by the GBF.
Most HSA discussions in home brew context are focused beer staling and stability in packaging, and not the direct and immediate impacts on malt flavors throughout the entire brewing process. The paper claims that above a minimal 1.0 ppm oxygen saturation, at any point of brewing, allows fresh malt flavors and aromas to quickly volatilize and disappear. It also claims that all of the home-brew oriented experiments so far are fundamentally flawed because the processes did not completely eliminate or manage oxygen exposure. My friend /u/Uberg33k at Immaculate Brewing explores this in much more scientific detail, and the claims swing a proverbial glove in the face.
To be clear, the LODO process addresses oxygen on a much larger scale and impact than is discussed by Fix. Hot Side Oxidation (HSO) attempts to describe malt and wort exposure to oxygen or oxidizing sources in the entire system. Because most home-brew systems are not designed to limit air exposure, sodium meta-bisulfite (SMB) is recommended as a fast acting prophylactic anti-oxidant, and implies that a brewer should take fairly extreme steps to reduce splashing and aeration, from liquor creation to wort production.
Let’s walk through some of the procedural bits. A dissolved oxygen (DO) saturation point of 1.0 ppm, or ideally 0.5 ppm seems dramatically low. Tap water is typically 7-8 ppm DO out of the faucet, and water out of my reverse osmosis system is about 4-5 ppm, measured with an oxygen meter. Heating water to mash temps will reduce oxygen saturation to about 4-5 ppm where boiling for 5-10 minutes can bring DO well below 0.5 ppm. The LODO method requires pre-boiling all of the liquor to deplete oxygen, and chilling rapidly to mash temperatures, along with very gentle handling to avoid splashing or aeration. Water sitting at mash temps has the potential of absorbing 1-2 ppm oxygen per hour. With most systems, the grain-in process may introduce additional 1-3 ppm oxygen saturation. All of this can be verified simply with an oxygen meter and some patience; however, I am leery of binary statements. Is 1 ppm DO a hard line or simply the part of a spectrum? GBF maintains lower is better, at least for German beer styles.
It is easy to overlook a comment to avoid copper, commonly used for immersion, plate, and counter-flow chillers. Copper’s conductivity and easy forming, makes it ubiquitous for home brewers. Immaculate Brewing’s article touches on metal ion’s possible detrimental properties. Quality stainless steel is recommended instead, despite lower thermal efficiency, and is more difficult to source. This can increase the cost of entry for a true LODO process replacing connectors, quick-connects, and chillers, with stainless alternatives. I borrowed a stainless HERMS heat exchanger to help chill my boiled liquor to grain-in and sparge temperatures.
LODO recommends a maximum dosage of sodium meta-bisulfite (SMB) in the mashing liquor at the rate of 100 mg/l. Because SMB contributes both sodium and sulfur compounds to the water chemistry, you should factor this in your water profile chemistry. The contribution is approximately 24 ppm sodium, and 76 ppm sulfur compounds that will break down into bisulfite, sulfur dioxide, and sulfate. For this reason, leaving sulfates out of your water profile is recommended. The amount of final bisulfite and sulfate is dependent on the levels of oxygen exposure. Also note, some sulfuric acid is formed that will cause your mash pH estimates to miss high. Expect a 0.05-0.15 lower measured pH to most calculator-based estimates, so target slightly higher than the recommended 5.4 mash pH, at room temperatures. At this concentration, the mash liquor is protected to about 15 ppm oxygen.
Much speculation swirls around the elevated sodium levels and impact of flavor, which may increase the perceived sweetness in the wort and finished beer. 24 ppm Sodium is certainly not excessive, and is well below documented flavor thresholds, but may have a supportive perceived impact on flavor. I often use table salt (sodium chloride) to build a water profile from RO. Of more concern, is the potentially expressive sulfur compounds. I have a high sensitivity to sulfur in finished beer, but welcome a fleeting whiff of sulfur in most German beers.
A positive side-effect of using SMB is the complete removal of chlorine and chloramine sanitation common in municipal water sources. Sadly, I continue to detect chloraphenols when judging in competitions. While the use of activated charcoal filtration certainly helps to reduce or remove chlorine, the flow rate through the filter relates directly effectiveness. Chloramines and some even some chlorine can break through the filter, even with a very slow flow. Make sure you replace your filters regularly and flow at the recommended rates. The use of SMB in this process before malt contacts water prevents potential chloralphenolic off flavors, even at low levels.
Not discussed in the paper, but suggested on the forum, is the potential to reduce the SMB additions as you improve your low oxygen brewing techniques. This would require iterative DO measurements, technique refinement, and hardware improvements to minimize oxygen exposure. If you have a meter, it would be possible to more accurately tailor SMB dosage to your system’s oxygen saturation profile (meaning the total oxygen saturation of the liquor and any aeration exposure during transfers and grain-in and atmospheric uptake during mashing). The paper claims approximately 15 ppm sulfite will remove 1 ppm oxygen saturation.
The paper recommends conditioning your malt with 1-2% water by weight and milling just before grain-in. This allows for more intact husk material and, according to Kunze, reduces oxidizing enzymes in the mash. The husks aid in filtering, and the conditioning allows for smaller grit creation, increasing extract efficiency potential. I should note this is more water by weight than many home brewers use in conditioning. It is also possible to use a very small amount of SMB in the conditioning water to address concerns about oxidation at a 15 – 25 mg/l dosage. I had already adopted conditioned milling, so this was just a minor adjustment.
Grain-in should be conducted gently, and underletting the dry malt (which is a best practice on the Brew-Magic) is the recommended method to minimize aeration, as this is likely the largest source of aeration. Underletting also seems to produce fewer dough balls, but you may want to make a gentle stir pass to ensure no dry clumps form. RIMS/HERMS circulated mashes add more potential aeration, but are commonly used by the GBF team. A slow circulation is recommended, as well as a careful survey of your plumbing system (watch for bubbles) to ensure it is airtight. A mash-cap and/or kettle-lid is used to minimize oxygen exposure and air movement over the mash. Confirm conversion using an iodine test, or with gravity readings.
During lautering, the sparging liquor (pre-boiled and quickly cooled) is dosed with 15 – 25 mg/l SMB as it cools below 180F (82C). The run off into the boil kettle is slow and gentle, and the lauter is gently delivered to the mash tun without splashing. Fly sparging under the mash water level is recommended. A no-sparge mash would avoid potential aeration from sparging, but lower potential mash efficiency.
The Bavarian Helles recipe utilizes acid malt, rather than a liquid lactic acid to manage pH. This is perhaps the first obvious nod to traditional German brewing practice. A classic Hochkurz step mash profile is outlined, but less obvious is the recommendation to shorten the mash period to reduce oxygen exposure. First Wort Hop (FWH) technique is recommended with 30% of the hops by weight in the boil kettle during lauter, and the rest at 60 minutes for bittering. The boil should be conducted gently (just above a simmer) and for 60 minutes. Chill quickly and knock-out as closely as possible to pitching temperature at 4-5C (41-43F), but do not aerate until after pitching. Try to keep the bulk of the break material out of the fermenter.
A couple of things stand out here that might concern home brewers: The pitching temperature is pretty low, and many brewers cannot quickly chill to that level in the kettle. The temperature is quite lower than most recommended temperature ranges from White Labs and Wyeast. Also, not mentioned in the paper, you may wish to allow the wort to sit at these temperatures (in a sealed fermenter) to allow cold break to settle – and pull the cold break before pitching. Regardless, chilling and transfers should happen as quickly as possible to reduce oxygen exposure without the protection of the yeast. Once the wort (and starter) is at the pitching temperature, pitch yeast and aerate.
The recommended pitching rates are slightly higher than many commercial brewers use; 1.6-2.5 million cells per milliliter per degree Plato. This requires careful planning and starter management. Pitch the yeast as fresh and healthy as possible. Temper the yeast to the pitching temperature. A few hours in the fermentation chamber should allow the starter to come to temp, and allow you to decant the supernatant and pitch the slurry. Stir to incorporate, suspend the yeast slurry, and aerate.
Aeration (sterile) should be conducted right after the pitch to about 8 ppm oxygen saturation. With the amount of yeast and plenty of aeration, the yeast immediately starts taking up the dissolved oxygen. Adequate aeration and the large yeast pitch should minimize diacetyl production and eliminate the need for a diacetyl-rest.
Over 48 hours, allow the primary temperature to rise to 8C (46F) and hold until 45% apparent attenuation has occurred. Utilizing a Fast Ferment Test will allow you to better estimate your target final gravity and calculate where you sit in apparent attenuation with gravity readings. At this point, the fermentation temperature is slowly dropped (0.5-1.0 C per day) back to 5-6C (43-45F). Hold this temperature until you have about 1.5 degrees Plato remaining sugars.
At this point, rack into clean, sanitary and purged kegs for secondary. The remaining sugars and active yeast should clean up any new dissolved oxygen, and will finish the fermentation and condition the beer during the lager maturation phase. The paper recommends using a spunding apparatus set to 0.8 bar to prevent excessive carbonation. Place the spund keg back into the fermentation chamber and slowly drop the temperature to 3C (37F) until hitting FG, then further slowly drop and lager for 4-6 weeks at -1C (30F). At this point, you can transfer off the secondary yeast cake into another fully purged keg. This will facilitate clearing without the use of finings, especially as the keg sits at serving temperatures.
So, it’s complicated and a bit intimidating. There are steps necessary to improve or check your gear to eliminate aeration. An O2 meter is necessary to do this without working blindly. Other additions, such as a spund valve, add a little cost, but these can be built fairly inexpensively. Of course, the costs of replacing any non-stainless parts can add up.

My Anecdotal Experience:
I have been focusing on the hot side, since I feel my cold side techniques have improved greatly. This meant spending the time brewing with and without SMB, and measuring pH and O2 saturation along the way. I attempted this with my reboot Helles recipe, but wrecked the beer by completely overdosing with SMB. It is clear from my notes that I made errors in conversion from mg/l to mg/gal, as well as doubling a dose of SMB in my sparge liquor on the LODO batch. The results were sulfur bombs, however, I noted a significant difference in the character of the wort. Difference, here, means clear and distinct malt notes – fresh malt, honey, and sweet cereal missing from my past lagers, but also sulfur. Several of the GBF team hung out with me online during the brewing process, and were a great encouragement. I dumped the Helles batches after fermentation as they had a strong onion taste from way too much SMB (my fault, not GBF’s!). It has taken a few experimental brew days to feel comfortable with the techniques and isolate problem areas.
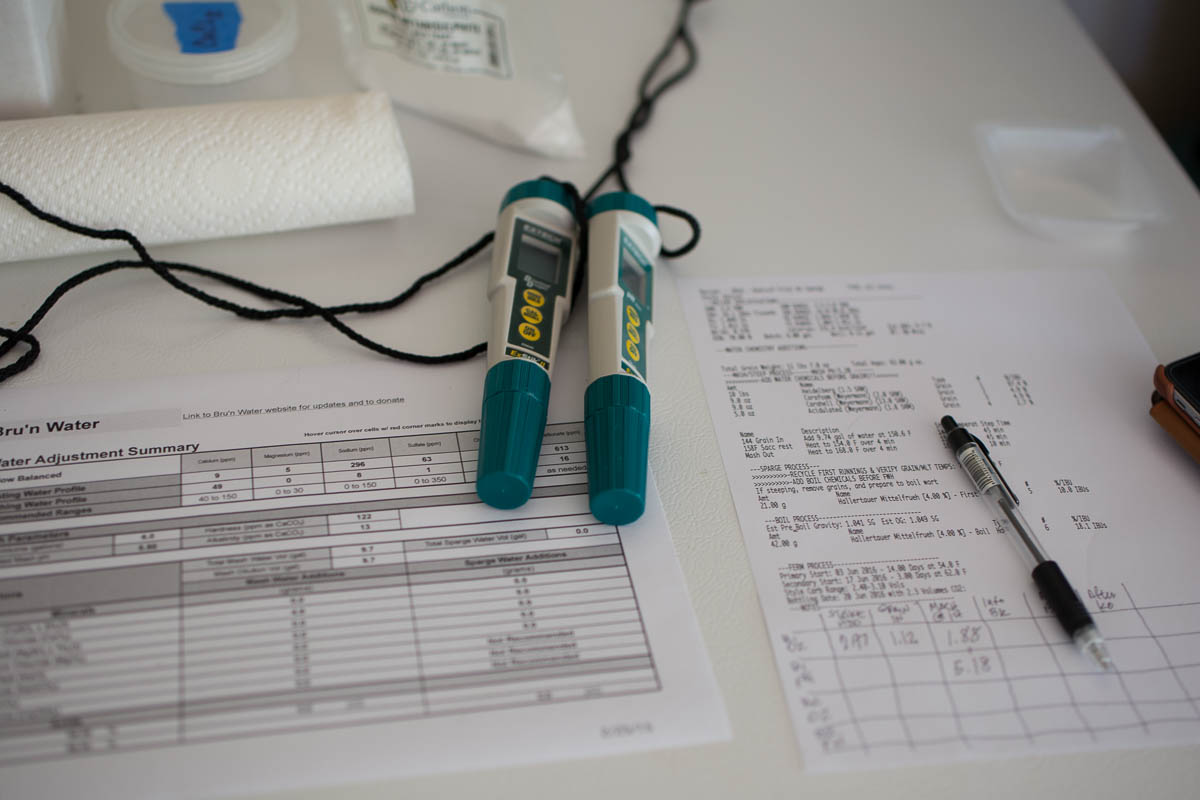
My measurements confirmed that I had a leaky system and technique, averaging about 9-10 ppm DO uptake in transfers and grain-in. The excessively dosed SMB batch illustrated the potential of scavenging, my O2 saturation never exceeded 0.7 ppm. It also showed the strength of sulfuric acid (a result of bisulfite redox), which brought the mash pH 0.2 units lower than my Bru’n Water spreadsheet estimate. So I tore apart the Brew-Magic and replaced and tightened all of the gaskets, and took the time to fully deep clean the plumbing, RIMS and pump. I also wrote a spreadsheet to ensure I don’t overdose SMB EVER AGAIN!
Lesson: Dose properly and carefully. Use a gentle technique for grain-in and any transfers to avoid aeration. Tighten up the system. Also, remember to account for a pH drop in the mash.
My next brew was British Bitter, done on the GrainFather. Since I figured out how to calculate the SMB properly, I followed the hot side procedure, worried that a manual sparge with the run-off dripping into the boil would cause aeration. The SMB did its job, and I was less concerned about flavor contribution with the slightly hard water profile I built. The result was again, different, as with the clear and distinct malt flavors, the extra dark crystal malt came through strongly as caramelized raison and dark sugar. I served this a few weeks later, and it was a hit, but the recipe needs to be revised. A low oxygen process may require re-thinking recipes, especially the use of higher kilned base malts and darker specialty malts.
My current batch is a LODO Koelsch, using proper SMB additions and very careful handling. This is by far the best Koelsch I have ever made, but again, purely subjective. The clean flavors of fresh pilsner malt, accompanied by a honey note and a touch of “Grape-Nuts” cereal flavors, come through and compliments the slightly floral hop and fruity esters from the yeast. It is currently conditioning. Using the standard doses and gentle transfers, I was able to keep the DO under 0.8 ppm throughout the process, and this time, the sulfur was barely detectable in the gravity sample.

Sensory Analysis:
For the most part, I experienced very similar sensory elements in the wort as described by the GBF: fresh base malt flavors, honey character from the Carahell, and a light bran-like cereal flavor from the CaraFoam. Hops also seem to shine, a little sharper and crisp. In the bitter, despite the strong dark crystal flavors, the wort melded the Golden Promise and Styrian Goldings into a toast and jam quality that was extremely pleasant. I expect the LODO Koelsch will be very good once it has conditioned, cleared and carbonated. In all cases, the run off was very bright and clear, and a few shades lighter than previous brews.
I am brewing batches for triangle testing and evaluation, and will follow up with this data, as well as measurements, now that I feel I have the technique down on my brewing and fermentation systems. There are many moving parts, and isolation of each constituent throughout the process for testing is difficult, so my tests will be focused on a “black box” treatment, matching water profiles where possible (including using sodium chloride to match the sodium contribution of SMB), and matching estimated mash pH.
Conclusion:
I am not a chemist nor have a brewing degree, so my ability to understand the complex of reactions that occur in the mash, boil kettle, and fermenter require me to rely on texts and papers and educated friends. I am also subject to bias. The marked differences (and seeming improvement) in the quality of my wort make me optimistic that the end product will be equally improved, but will also color my perceptions of the finished beer. The big question is more than, “Can the different beer be picked out of a triangle test?” – rather, is the end product better? Such subjective answers are still out.
I want to believe these changes will move me forward, not by inches or feet, but by yards. Maybe enough to pick up a few extra points in competition… from the low to mid 30s pushing up into 40 range. Mostly, improved enough that I can confidently share a helles or German Pilsner with very picky and experienced brewers!
But this is not “proof” adequate to answer the questions raised by the GBF paper. My searches of brewing texts reveal some contradictions on topics of HSA and the role of oxygen in general, and a specific lack of detailed research. I remain of the mindset that you should try this yourself, and see if the pursuit of reduced oxygen makes sense for your brewing approach and the required changes to your equipment. I fall into the camp of a detail freak, so focusing on this technique has not taken any of the FUN out of brewing for me, with the possible exception of exposing my ability to make stupid math errors. Clearly, you cannot just toss in some metabisulfite and expect great results without careful technique and planning.
I encourage more brewers to have an open mind and give LODO a try. Mostly, I appreciate the lively discussions and revisit of the role of oxygen in brewing. I feel compelled to thank Bryan R, Brandon, Techbrau, Ancient Abbey, and the other GBF members that have helped to provide tips and tricks along the way to this point. It is much appreciated.
My next LODO article will have a table of data comparing a non-LODO and LODO brew session, as well as some possible strategies.


Great article! Mind sharing the recipes for your bitter and kolsch? Thanks!
Hi Jink…
I’ll share them eventually. I need to tweak the bitter quite a bit. The Kolsch runs about 95% continental pils with 3% CaraHell and 2% CaraFoam. It comes out very pale – so a little Vienna mixed into the base would be appropriate. I have used both Wyeast 2565 and the Imperial Yeast Dieter. Cold ferment at 54-56F.
As a chemist who works with oxygen reactive and mositure sensitive reagents, learning barrier and air free technique to exclude oxygen is something very basic to most all organic synthetic chemistry. And the food process industry has ALWAYS worked hard to minimize exposure to oxygen during all food process steps excluding baking and tunnel drying. I have always used dry nitrogen gas as a purge and blanket when cider and meadmaking. I use the gas to transfer liquids under small positive pressures so not to deal with electric pumps and store my equipment purged with nitrogen to dry out lines and keep conditions anti-fungal due to oxygen free storage. I just seal them up in polyethylene plastic bags after sparging with nitrogen for a couple of minutes. Nitrogen gas cylinders are the most inexpensive dry gas available at welding stores and once you get one and a dual stage regulator, you are all set except for the tygon plastic gas lines needed to purge and sparge. Use heavy duty plastic bags and bicycle inner tubes as rubber bands to seal the tops of your brewing vessels and mash tuns. Duct tape can make a re-sealable flap for adding a plastic line to the container. Keeping a gas blanket over top of these vessels when transferring liquids will keep them oxygen free. Sparging with a disinfected aquarium airstone (preferably new, of course) will let you remove dissolved oxygen from liquids efficiently in about 30 minutes of strong nitrogen bubbling through the liquid. Room temperature aqueous solutions will equilibrate back to 10ppm O2 in minutes if exposed to air. Colder liquids means even more dissolved oxygen so no way to minimize exposure unless you have a source of oxygen free gas and that would be nitrogen as argon and helium work even better but cost so much more to use. I can’t imagine the workarounds to acheive these ends if a dry oxygen free gas supply was not available.
When done and ready to keg or bottle, Dry nitrogen can add a nice creamy head, a la Left Hand Nitro Milk Stout or Guiness etc. It’s a source of gas pressure without the solubility and tang of CO2.
Thanks for the post, Matt, and the work behind it. Really balanced and informative.
And I thought my brewday couldn’t get any more crammed with obsessive attention to detail! While this is certain to add significant time to an already long brewday (specifically grain conditioning, pre-boiling all liquor) I do love a good Kolsch and I’ve been trending toward a greater appreciation of lagers recently too, so it seems like it could be worth the effort (anything for art!).
And then there is the competition angle that you point out too. I’ve had a Pilsener that was scored recently in the high 30’s. It was encouraging, but left me wondering “what would it take to get into the 40’s?”.
Did you do any triangle tests yet?
Hi Rob, not yet. I am having issues controlling DO using the GrainFather, which I brew with in the heat of summer. Now that we have bearable Central Texas temperatures – I will be getting back out to the garage where the Brew-Magic has a much better config to control DO.
I am interested in trying LODO with a saison. Since I would likely pitch ~65F and ramp up to 75F, I am wondering if it is even worth trying. Any thoughts? Thanks for the great article.
I think it is worth trying, but do expect the specialty malts to show a bit more character. LODO seems to really showcase the base malts, and I have needed to shift my specialty and adjuncts quite bit to restore my expected balance, generally a lot less that before.
I see no issues with your plan for sure. If possible, consider open-fermentation, with just a loosely covered airlock (unless you have fruit fly problems). That seems to help prevent any stalling. I just completed fermentation on a unintentionally dark saison (see above – too much dark crystal) using Belle Saison – ended at 1.001. It’s carbing up as we speak (spund and krausen’d).
I’m also curious to hear more about the technique you used on the GrainFather. It is a bit hard to tell from the text of your article. Are you stating that despite the dripping of wort from the malt pipe to the kettle below during lautering and sparging, the SMB kept DO <1 ppm? Did you take any measures to reduce the dripping of the wort into the kettle below, or minimize aeration during the fly sparge? I've been playing with the idea of using a ratcheting pulley setup to raise the malt pipe with the raising wort level in the kettle, effectively keeping the bottom of the pipe below liquid to prevent dripping/splashing during lautering and sparging, but it seems like a huge PITA if it's not strictly necessary.
When removing the basket I lifted it and let it drain without splashing before settling it on the stand. Your idea of using a ratchet and pulley would let your sparge with minimal splashing. I did use a slightly higher SMB dose in the sparge liquor @ about 50 mg/l. The measurement after lauter was in the 0.89 ppm area. This was using a slow and gentle manual feed of the sparge liquor using a measuring cup. Otherwise I sparged normally.
OK, that makes sense. I think I’m going to give this LODO stuff a shot this weekend. In order to prevent screwing with the sparge, I’m going to do a 100% brewing liquor mash with no sparge. The problem with that is I’m not sure how much SMB to use. They recommend 100 mg/L for mash and something like 10-20 mg/L for the sparge water. If I treat the mash at 100 mg/L I’ll be way over their recommended concentration in the final wort, but if I cut it back, I’m not sure if I’ll have sufficient protection of the wort during mashing. Maybe I’ll aim for something like 75 mg/L as a compromise. Trying to keep the Na from going above threshold levels.
I’m also using a Grainfather and I’m extremely interested to know how I can refine my wort movement. With all this LODO discussion I can only be suspect of removing my malt pipe too quick will cause a lot of excess splashing and I’m also curious to know if there is a way to move the sparged wort into the main vessel without excessing dripping. Thanks for lighting this fire. Cheers
Hi Carlsb, I am toying with the idea of moving the basket into a bucket with a spigot and slow sparking there, with a hose to return to the BK.
I can’t help but wonder how many “sick gainz” one would get by merely being more careful/intentional about one’s processes. Correlation/causation, etc.
Still, thanks for doing the grunt work of testing it out on your system! It’s a level of tedious/expensive that I’m not quite willing to commit to until there’s some solid evidence on the homebrew level that it produces non-trivial benefits.
TBD. My simple experiments should only peak curiosity and not be taken as empirical proof. Going to take a lot of data, analysis, triangles, etc. to truly prove anything. But you know this.
I’d be very interested to hear about your process on the Grainfather!
Great article, I’ve been hanging out for it!
Excellent post, Matt! Congrats on the recent brew success and I’m looking forward to your follow-up articles. Cheers!
“my ability to understand the complex of reactions that occur in the mash, boil kettle, and fermenter require me to rely on texts and papers and educated friends”
But you went to the Chemistry of Mashing Seminar! You are an expert now! Nice getting a chance to meet you last weekend, cheers!